How to Paint Furniture to Look Antique?
 A gentle sanding prevents sandpaper from going through the laminate layer.
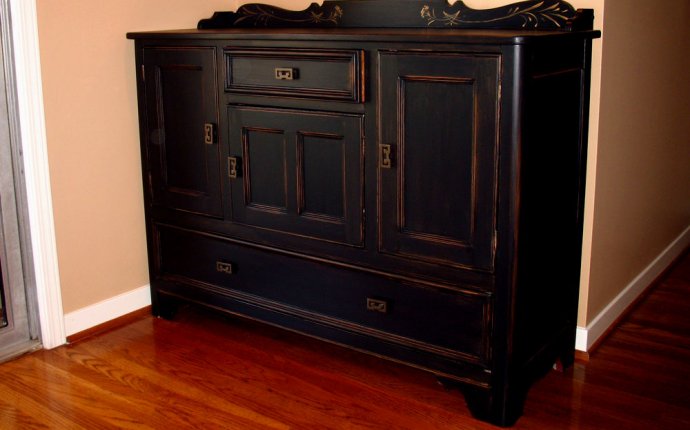
A piece of laminate furniture that has already been painted is ready to go when it comes to giving it a distressed appearance, as you won't need to prime it or give it a base coat. Laminate is not quite as forgiving as true wood when it comes to distressing, so it's a bit more difficult to create the kinds of dents and dings that would be found on actual wood without breaking through the laminate surface. Achieve a distressed look with additional paint plus faux finishing techniques and supplies.
Basic Preparation
Cover the areas you don't wish to paint, like the hardware, using painter's tape. If the hardware, such as drawer handles, comes off easily, remove them using a Phillips-head screwdriver.
Place a piece of newspaper over the work surface and set the furniture atop it, or position the paper around the furniture if the project piece is too heavy to move easily.
Sand the edges and sharp areas such as ornamental details using a fine-grit sanding block to smooth them slightly, giving them a gently distressed appearance. It's fine if the sanding goes through the paint layer, as this contributes to the distressed look. Be careful not to go all the way through the laminate layer, which is similar to a coated piece of paper. Wipe away the dust with a tack cloth or soft rag.
Waxing Decoratively
Rub the entire furniture piece down with candle wax; an actual unlit candle will suffice. The wax makes it easier to remove additional paint layers.
Pour some latex paint in a paint tray, such as an antique white shade, then paint over the waxy furniture using a paintbrush. One coat may be all that's necessary, as you're going to sand the paint anyway. Allow the paint to dry completely.
Rub another layer of wax over the new dry coat of paint. Paint on a completely different color, such as robin's egg blue, allowing it to dry completely. Apply a second coat if you like, if this is going to be the final paint color. Optionally, you may continue with one more wax layer and one more paint layer.
Sand the surface of the project piece with a fine-grit sanding block, focusing most of your attention on areas that normally would receive the most wear, such as sharp edges, a tabletop or desktop, and areas near drawer handles. Sand through one to several layers of paint in various areas, creating a well-worn, distressed look.
Crackled Creations
Brush the entire project piece down with crackle medium, going over each area only once. Allow the crackle medium to sit for the amount of time recommended on the package, just until tacky, but not dry.
Paint a coat of latex paint over the tacky crackle medium, using a color vastly different from the original shade for the most visible effect, such as black over white or yellow over black. The paint will begin to crackle almost immediately. Allow the paint to dry completely.
Sand some areas of the crackled paint that would normally receive wear, such as the edges of a table or hutch, to add to the distressed look. Gently sand the entire piece if you like a warm, ambient look to the crackle rather than harsh cracked lines. Wipe away the dust with a clean rag.
Things You Will Need
- Painter's tape
- Phillips screwdriver
- Newspaper
- Fine-grit sanding block
- Tack cloth or soft rag
- Candle wax
- Latex paint in at least two colors, different from the existing paint finish
- Paint tray
- Crackle medium
Tip
- The finished distressed piece can be sealed with polyurethane, or left as-is to allow it to distress even more on its own.
- To add to the aged appearance of the distressed furniture, rub it down with thinned brown or black paint using a rag. Dip a paintbrush into the mixture and flick some thin dots of paint onto the project in various areas, to emulate the look of worm holes or damage spots.


