Antique Dresser on Wheels
 This is one of those posts that was totally not planned, but I just have to share this quick antique dresser restoration with you! Our recently graduated nephew has come to live with us while establishing himself in Oregon and that meant an overhaul of our son’s room (see his previous surprise extreme room makeover here) to accommodate two college-aged men.
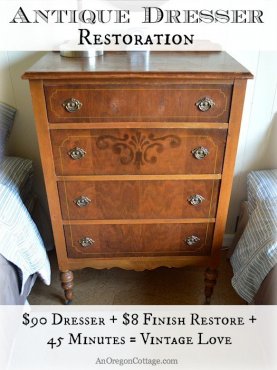
I’m planning to share the entire new room mini-makeover soon, but today is all about a $90 antique dresser we found after realizing the shorter, wider dresser our son had been using made the room too crowded with two twin beds. And how I was able to quickly restore it to a nicer finish – an amazing finish, actually!
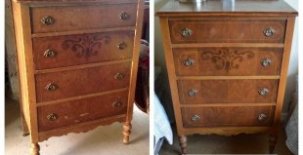
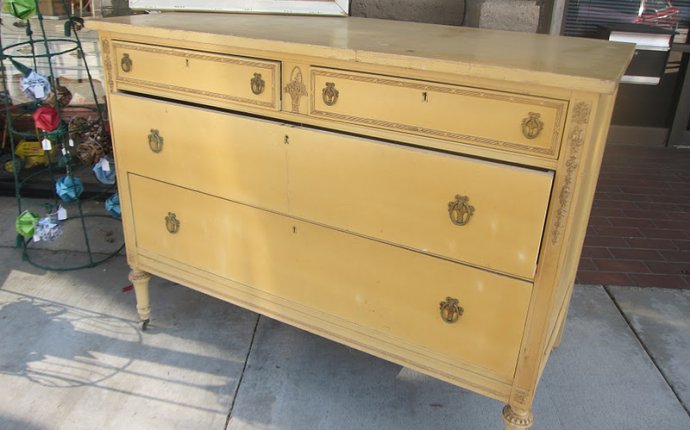
Of course we waited until the weekend before our nephew was scheduled to arrive before finding a dresser that would work with our budget and space considerations. I had been searching Craigslist for a couple weeks to no avail, so we tried the area thrift and used furniture stores and found this gem:
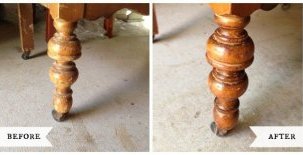
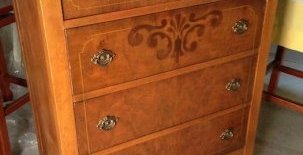
 Original hardware, sweet turned legs (on casters!), dovetail joints, and a key point for a boys dresser – smooth working drawers {of course those who follow me on Instagram already know about this score!). I couldn’t believe it was only $90.00! We found it at a used furniture/liquidation store and a similar dresser at a thrift store we visited had a price tag of $249, so as soon as I saw the drawers were in good condition we bought it.
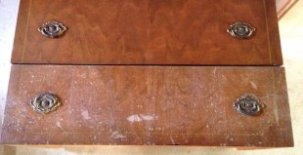
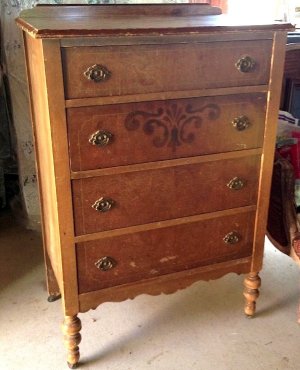
Now I’m sure one of the reasons it was priced so low was because of the condition of the finish. It was covered with water spots and nicks, but the veneer was in good condition – only slightly coming up in a couple of areas, but nothing major.
While this seemed like a prime candidate for painting (I wasn’t even sure I liked the center motif…), I did mention we saved this to a few days before our nephew’s arrival, didn’t I? Time was a major factor in this case.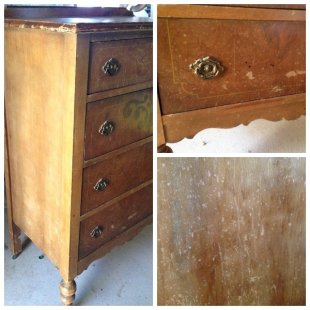 That and the fact that I really wanted a wood-finished piece for the room.
So after lightly sanding the whole piece, I pulled out an old bottle of Restor-A-Finish that I’ve had for a long time, sorta desperately hoping I could just make the dresser presentable. Remember we’re not big on perfection around here? I actually like the character that comes from years of use on furniture, so I’m not always trying to make something like new.
But I was still amazed – as in, AMAZED – how this stuff worked! My photo of a drawer in-process looks just like the bottle’s cover photo – it actually works just like that!
- Lightly sand entire piece of furniture with a fine grit.
 You can remove hardware or not (I didn’t).
 - Using gloves and a rag in a well ventilated area, apply a bit of finish restorer to the rag and then rub it into the wood a section at a time. Wipe section with a clean rag before proceeding to the next section.
- Continue until the whole piece is covered to your satisfaction. It’s okay to reapply to areas, but it may not make a difference.
- Let dry 24 hours before coating with water based polyurethane or furniture wax as needed. I only coated the top.
Look at the difference in these drawers – see? I’m not even exaggerating! Since I wasn’t sure if it would even work, I only used my phone to take these photos – that’s how unsure I was of even being able to share this with you guys.