Antiquing Furniture Techniques
 I love a good furniture makeover. It's one of my favorite things. Today, I'm kicking off the first of the year with this classy rustic black painted nightstand makeover that was painted and distressed without using ANY sandpaper!
This natural furniture distressing technique is one of my FAVORITE go to methods to give a piece a naturally aged and worn look! This technique doesn't leave messy sand paper residue, it doesn't require wax or vaseline or wire brushes.
It's an easy and quick distressing technique that leaves furniture looking naturally distressed each and every time!
This post contains affiliate links to products I love and use every day. You can view our full disclosure here.
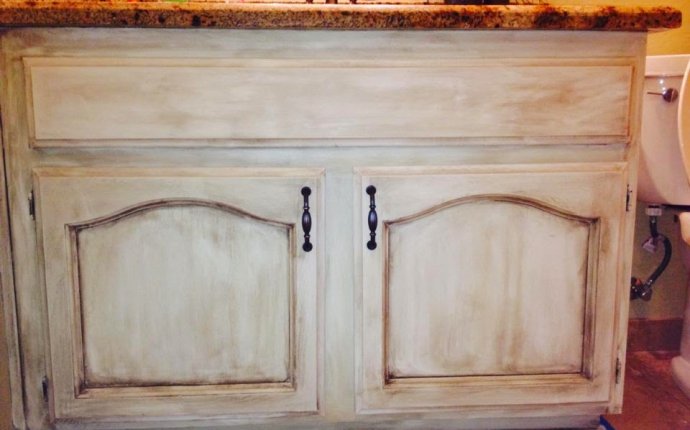
Here's what I had to work with.. a well built nightstand with an orangy-brown stained finish. It had a few dings from normal wear and tear but that's okay! In a minute, I'm going to show you how I embraced those natural worn areas and used them to my advantage. ;)
The top of the nightstand was worse off.
 It looks delicious, right!? ;) Okay enough gross pictures, let's talk distressing..."The secret to getting a naturally distressed piece of furniture depends on the amount of paint you put on your brush and the pressure in which you apply it." -Thirty Eighth Street
Furniture Distressing Supplies:
(Some of the links below are affiliate links for your shopping convenience.Click here for full disclosure.)
Natural Furniture Distressing Technique
The secret to getting a naturally distressed piece of furniture depends on the amount of paint you put on your brush and the pressure in which you apply it. Wait what?! Yes, you read that right. With this technique, the majority of the distressing process actually takes shape while you're painting the furniture. This technique of distressing has four easy steps and goes rather quickly! Are you ready? Here we go!...
Step 1: Apply A Light Layer Of Paint To Your Clean Piece
This is a good rule of thumb for painting furniture period. Several light coats of paint will always adhere and look better than one heavy one! But, it's especially important when we're talking about how to naturally distress a piece of furniture.You want your piece of furniture to receive some light and uneven coverage for the first coat. What do I mean by uneven coverage? I mean that you shouldn't try and cover every inch of your piece with paint.
Leave some of the natural wood tones peaking through AS WELL AS leave some of the areas of your piece completely untouched by any paint. Edges, corners, raised areas, insets that have details, and imperfections are some really great examples of where "not to paint".
Step 1 Photo Example: In this first coat, the black paint was applied very lightly.
 There are some bare spots where the wood finish is exposed as well as large areas where the paint was applied lightly so that traces of the wood finish show through.
RELATED CONTENT:
_________________________________________________________________________________Step 2: Apply Another Light Layer Of Paint To "Focused Areas"
On the second coat, dip your brush so that . Then, scrape the sides of your brush against the edge of the paint can so that your brush isn't dripping with paint. Your brush should have more paint on it then in Step 1 but, it shouldn't be so full that it makes a mess once it leaves the can. Here's where we talk about . This next part is really important! After you've dipped your brush into the paint, your paintbrush will be heavy with paint. Therefore, wherever you place your paintbrush on your piece is where you''ll get the most saturated coverage.Taking that into account, we can use that to our advantage and be a little bit strategic in our placement. For this step, select 3 random areas within a 2' section of your piece where you want heavier coverage. (There should be space in-between your designated 3 focused areas.)
Using medium pressure, give a paintbrush stroke to each of those 3 areas. With each stroke, the bulk of your paint will begin to leave your brush.


