White Wash Antique Furniture
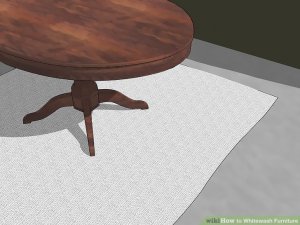 Place the furniture over a drop cloth. You can use newspapers instead, or any other material to catch the drips.
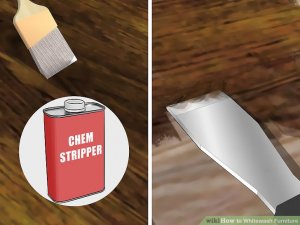
- Warning: chemical strippers are extremely caustic. Use only in ventilated areas and cover your skin, eyes, and mouth (with a respirator).
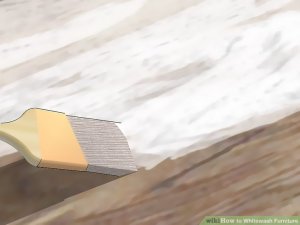
- Brush the stripper onto the wood with as few strokes as possible. Cover the whole surface, but manipulate the stripper as little as possible for maximum results.
- Wait 3–5 minutes while the stripper dissolves the sealant.
- Scrape the dissolved "goop" off the wood. Steel wool is helpful for hard to reach corners.
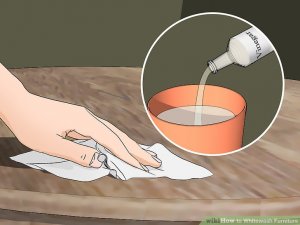
- If you use chemical stripper, do not skip washing the wood with vinegar and water. This will neutralize the stripper and make the wood safe to work with and able to hold whitewash. (Alternatively, you can use turpentine, mineral spirits, or a paint neutralizer.)
- Wait for the furniture to dry completely before continuing.
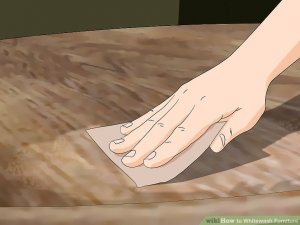
- If the piece has an existing layer of paint, lacquer, or stain, you'll need to sand it off entirely.
- When mixing your own, a 2:1 ratio of latex paint and water will create a very thick layer of whitewash, while a 1:1 and 1:2 ratio result in successively thinner mixes.
- Similarly, you can make your own whitewash by mixing turpentine into an oil-based paint until the desired consistency is reached.
- For both homemade and store-bought products, stir the mixture thoroughly before using.
- Any "stain" or "pickling" should work for any type of wood.
- Purchase a whitewash stain, not a whitewash paint. The latter is a lime and chalk based paint, which will take much longer to dry and obscure the wood grain.
- For oak or other wood with large grain and pores, apply the whitewash against the grain to ensure it covers the contour of the wood.
 This technique is called "pickling".
 - For pine and most other woods, apply the whitewash in the direction of the wood grain for best results.
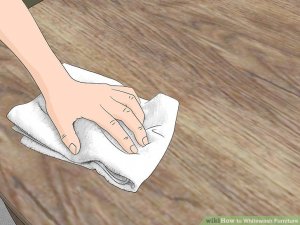
- It may be quickest to apply the whitewash in long, even strips the length of the surface, allowing you to wipe off the excess (see below) in one motion before moving to the next strip.
- Use a sponge to whitewash hard to reach areas such as corners.
- This is especially important for oak and other wood with large pores.
- You can skip this step if you prefer the intentional "amateur" look of individual brush strokes.
- You can use a dry sponge instead.
- If the excess blobs have already dried, use sandpaper to remove them.
10
Add additional layers if you desire. Applying additional layers (and again wiping off the excess) will create a thicker layer that obscures more of the wood grain. This incremental process makes it easy to create the exact combination of color and wood grain that is right for the project.- One coat is often enough, especially if you mixed your own whitewash to the desired consistency. If you find yourself adding more than three layers, you may want to use a thicker whitewash.
11
Seal the whitewashed furniture (Optional) . After the whitewashing is completely dried, apply a clear water-based sealant over the surface. This will protect the whitewash job and allow it to look fresh and new for a long time. Most sealants can be applied using a brush or even a lint free sponge.- Always use a clear water-based sealant. Oil-based sealants may give your furniture a yellow tinge that detracts from the intended color color.
- Apply the sealant in long even strokes.
 Method 2
- Prepare the wood. Just as though you were actually whitewashing, you should sand and clean the surface to be brushed. Remember to place the furniture over something that can catch any spilled paint.
- Since you'll be applying paint instead of stain, you do not need to thoroughly remove old finish (sealant) unless it is flaking off. In that scenario, see instructions for chemical stripping under Whitewashing Furniture or thoroughly sand the finish off.
- Dip the brush very lightly into paint. Use full strength (undiluted) paint. The goal is to barely have enough paint on the brush to spread. Wipe it off on a rag if you get too much paint on it.
- If you can't find a balance between being able to spread the paint and keeping the layer of paint very thin, dip your brush in water and shake it (not on the wood) before applying.
- Quickly and lightly brush the wood. If you pause during the painting or make the initial contact between brush and wood too heavy, you will get uneven blotches of paint. Try to move as rapidly and lightly as possible.
- Be especially vigilant while brushing the corners. It's easy to slow down while trying to reach the edge of the surface, but that will cause an uneven paint layer.
- If you want to avoid the appearance of brush strokes, make your strokes as long as possible, but maintain an even speed and light touch.
- Blend uneven spots with a rag or sponge. Still using a quick, light touch, find any uneven or overly thick spots and gently brush them into their surroundings for an even appearance.
- Apply a sealant. One or two coats of a water-based sealant will preserve your furniture without altering its color. Wait for the paint to dry completely before applying.
Method 3
Painting Furniture White- Sand and wash the furniture. Use this process for metal or wooden furniture. Let it dry completely before continuing.
- Sand wooden furniture gently. Unlike using a whitewash stain, you're trying to (largely) obscure the wood grain and make the furniture completely white. Over-sanding pine or oak can cause tannins to leak through the paint and tinge it yellow.
- Stripping off old finish is not necessary unless the finish is flaking off. If you need to, thoroughly sand the old finish until it is removed or follow the instructions under Whitewashing Old Furniture for safe use of chemical strippers.
- Brush on a coat of primer. Let this coat dry as well before continuing.
- Use a gripping primer on surfaces that are at all glossy or shiny.
- Use a stain blocking primer for surfaces that have already had a stain applied.
- Try to use water-based primers if your paint is water-based, and oil-based primers for oil-based paints. Mixing the two types will often work, but not always.
- Rub with fine grit sandpaper. Sanding between each coat of primer, or at least before the final layer, removes excess primer that has dried in uneven ridges.
- Brush on additional coats of primer. Each layer of primer should be very thin, so use at least two before painting. Always let each primer dry before applying the next.
- The primer does not need to hide the color underneath. That's what the paint will do.
- Apply several thin coats of paint. Use a clean brush to apply the paint, and allow each coat to dry before applying the next. Using at least two thin coats of paint will create a smooth and durable result.
- Paint with a roller or use long, even brush strokes to apply an even coat of paint to a large flat surface.
- For detailed or curving metal work, use a small craft brush from an art supply store.
- Apply sealant (optional). 24 hours after the last coat of paint was applied, you may coat the furniture with any type of sealant to protect the paint job.
- If you don't seal your furniture, avoid touching it as much as possible for a few weeks until the paint fully cures.
Community Q&A
Add New Question
- Can I use this method on black rattan/wicker chairs?
wikiHow Contributor
Yes, as long as the piece is properly cleaned (washed) and dry before starting the priming/painting process.
Ask a Question
If this question (or a similar one) is answered twice in this section, please click here to let us know.

Source: www.wikihow.com


